
Kling Image to Video: Animate Photos & Use Start/End Frames
Turn a photo into a Kling video. Learn image upload, motion prompts, start and end frames, clip settings and credit costs, then open the generator.
Last updated: 2026-10-12
Use a product photo, portrait or illustration as the opening frame, then describe what should move. This guide covers Kling 3.0 Standard on Kling 4 Generator: 3–15 second clips, an optional end frame and audio generated with every render. The model picker shows what is available before you generate.
Sign in to upload your image. Generation uses credits; opening the workspace does not start a paid render.
How to turn an image into a Kling video
- Open the workspace and select Kling 3.0. Check the model in the composer, especially if you previously used another model.
- Attach your starting image. Use the attachment control to upload a JPG, PNG or WebP. Wait until the upload completes. A clear subject and the crop you want in the final video make a useful starting point.
- Describe motion, not just appearance. Say what the subject does, how the camera moves and what should remain unchanged. For a first attempt, use one action and one camera move.
- Choose a short test. Start at 5 seconds with Standard settings. Audio is generated with every Kling 3.0 render; the cost is fixed per second, so you know it before sending.
- Review the result. Check the model label in your library, subject shape, camera movement and final frame. Revise one instruction at a time; each new render consumes credits again.
A published image-to-video example
The pair below is fal's published Kling 3.0 Standard example, linked from its model page. It is a provider demonstration, not a render made through this website or a guarantee of the same result. The linked preview is about 5 seconds long; it is a published demonstration, not a reproduction log for the editable form on the source page.
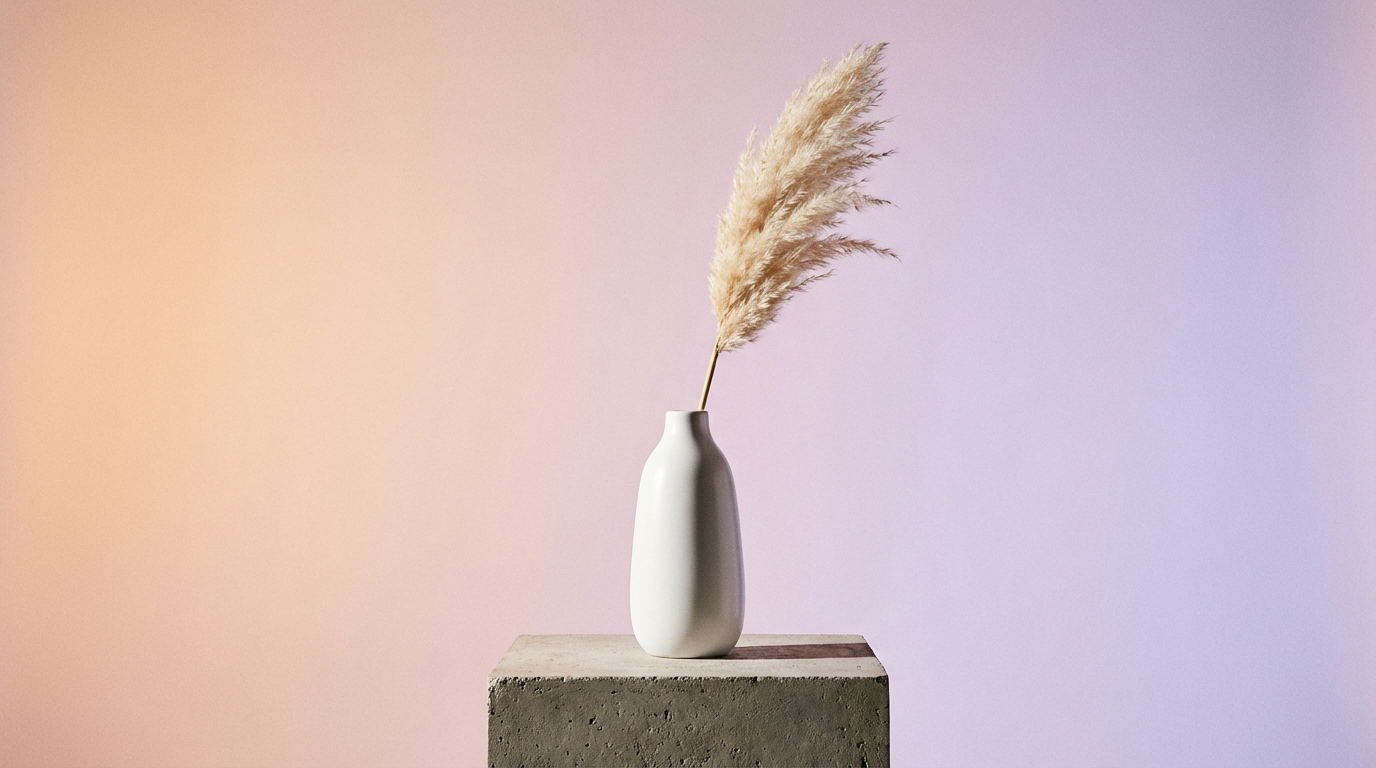
Input image · published by fal
Output video · Kling 3.0 Standard
The example asks for a camera orbit around a vase, with gentle movement in the lighting and grasses. It demonstrates motion from a still image.
Prompt excerpt: “Camera slowly orbits around the vase. Soft light shifts across the ceramic surface.”
Open fal's original example and full settings. The media loads from fal's external hosting; the source page is also available if playback fails.
Motion prompts you can adapt
These are suggested starting prompts, not tested output claims. Use your own matching image and keep the first attempt simple.
Product photograph
Keep the product and its label unchanged. Move the camera slowly closer while a soft highlight travels across the surface. The product stays still. One continuous shot, no scene change.
Portrait
The person blinks naturally and turns their head slightly toward the window. Keep the camera still and preserve their face, clothing and background. Use subtle motion without a cut.
Landscape or illustration
Keep the composition fixed. Let the clouds drift slowly and the foreground leaves sway gently. Preserve the original illustration style. No new objects and no sudden camera movement.
Use a start frame and an end frame
Attach two images in order: the first is the opening frame and the second is the desired ending frame. In the message, explicitly identify them as the start and end, and describe the transition between them.
Use the first attached image as the start and the second as the end. Move the camera slowly between these views in one continuous shot. Keep the subject and lighting consistent.
For a first test, use the same subject, similar framing and compatible lighting in both images. An end frame guides the destination; it does not guarantee a perfect interpolation. Start and end frames are not two interchangeable character references, and this workflow does not join two existing video files.
If the transition distorts, reduce the change between the two frames or try a single starting image. If you want a longer story, generate separate shots and edit them together.
Settings and credit costs
| Setting | Kling 3.0 on this site |
|---|---|
| Input | One starting image; a second image can specify the ending frame |
| Clip length | 3–15 seconds per render |
| Model tier | Standard |
| Framing | Image-to-video follows the source image; crop it before uploading |
| Audio | Generated with every render (not switchable); review voices and sounds before publishing |
| Example cost | 350 credits for 5 seconds; 700 credits for 10 seconds |
The examples above use the same credit calculation as the app. A new attempt is a new render, so leave room for revisions. The workspace stops you before a render your balance cannot cover; check current plans before generating. There is no promise of unlimited free generation.
Common questions
Why does my photo barely move?
Ask for a visible action rather than repeating what is already in the picture. Start with a small head turn, moving clouds or a gentle push-in. If you ask for everything to remain still, little motion may be the correct result.
Why does the face or product change?
Large movements, occlusion and many simultaneous instructions can make the result harder to control. Try a shorter clip, a clearer source image and less motion. Review fine details such as hands, text and logos before using the output.
Can I generate Kling 4.0 here?
Use the live status banner above and the workspace model picker to check availability. This tutorial's settings and credit examples refer to Kling 3.0; they do not promise Kling 4.0 features. Read the Kling 4.0 overview for the release background.
How does this compare with SnapGen?
SnapGen also advertises image-to-video and lists Kling models. Our SnapGen AI comparison explains the verified overlap, billing differences and reasons to try a conversation-based workflow.
Make your first short clip
Start with one image and one movement. Choose Kling 3.0, note the credit cost and review the result before making a longer version.
Open the workspace and upload a photoNeed help with an upload or a render? Contact support after signing in.